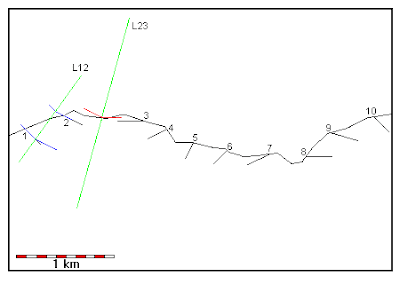
Kink method: The basic method is to allow each dip measurement to define a zone where the dip is constant. The boundaries of the dip zones are the lines that bisect angles between adjacent dips. The example below begins with three different ways to find the bisector.
>
 |
| Extend the dips out to L12. When you cross the line, continue with the dip on the opposite side. That is, use dip angle 1 on the left side of line L12 and dip angle 2 on the right. |
 |
| Here's another way: halfway between datum points 2 and 3, draw lines parallel to dips 2 and 3 (shown in red). Bisect the angle to find line L23. |
 |
| Lines left of L34 have dip 3, to the right they have dip 4. Continue the lines that originated at datum points 1 and 2 by extending them through L34 with the appropriate dips. |
 |
| L56 constructed. The rocks at datum point 6 are stratigraphically lower than any we have so far seen, so we extend dip 6 to line L56, then continue to the left parallel to the previously drawn lines. |
 |
| L67 constructed. The rocks at datum point 7 are even lower than those at datum point 6, so we also extend dip 7 to line L67, then continue to the left parallel to the previously drawn lines. |
 |
| L78 constructed. The rocks at datum point 8 are still lower , so we also extend dip 8 to line L78, then continue to the left parallel to the previously drawn lines. |
 |
| L89 constructed. Datum point 9 lies between two already constructed lines and is not likely to tell us anything we don't already know. For now we omit drawing a line through it. |
 |
| L910 completed. Since point 10 falls close to an already drawn line, there is no real need to construct another line for it, either. |
 |
Here the cross section lines are subdued. Most of the time you can modify the fold shapes by hand to match the stratigraphy without too much trouble. Modified contacts are in black. |


ليست هناك تعليقات:
Write التعليقات